Friday, January 17, 2014

PROJECT HOME: DINING ROOM PROGRESS

I mentioned quite a few weeks ago that we made some fun layout decisions for our main floor. Instead of keeping two sitting rooms and a formal dining room, we decided to turn our "den" into the main and only sitting room, turn our formal dining room into my studio and turn our living room into our dining room! Sound confusing enough? Check out this post for a quick visual of what I mean. :)

Two weekends ago, Jon and I got a burst of energy and decided to finally paint over the beige walls in the new studio and dining room and start the steps to bringing these spaces to life. One of the most helpful strategies we've done in our home is that whenever we decide to paint a room, we also replace all outlets, switches, cover plates, vents and doorknobs in order to give the space a completely fresh look. We love saying goodbye to mix-matched plates, brass vent covers and doorknobs from the 70's that don't work anymore! -- Each time we do this it completely transforms the space and takes out the "grunge" feeling from living in an older home and really brings out the charm! You can see from the photos below how dark and grungy this space felt before. The first photo is from the original house listing when we bought it and the remaining are from right before we got to prepping and painting. :)


For the dining space, we decided we wanted to really create a beautiful central entertainment room that would be suitable for hosting a large dinner and friends. We also decided that since most of our vision for the main floor includes a lot of neutrals that we should go ahead and take the plunge at embracing color and really make this room a statement! -- That we did! I brought home a huge stack of paint samples from Lowe's, we taped them on the wall, and took about 2-3 days to decide what color was best. Even then, last minute we changed our minds and went with this super striking Emerald color from Pantone. Emerald was 2013's color of the year, by the way! This color is surprising and refreshing. I was super nervous about it beforehand but after seeing it on the walls during the day and during the night, I fell in love. It's gorgeous and is SO fun. I can't wait to really get my hands on this room and get it furnished!


My vision is to have a massive bright white table, metal chairs, some funky faux hide rugs, a beautiful gallery wall AND as a project for down the road, we want to do a huge built in bar area complete with a fridge, glassware display and all the fixings for cocktails, mocktails, coffee, soda, and cocoa. Jon and I have definitely spent a fair share of time in this room imagining the space and we can't wait to see some of these projects begin! But first, we're just focusing on the tables!!

Also, just as a fun and quick side note, as you may notice in these pictures we've strung bulb lights from the ceiling. These were actually left-over lights from our wedding in 2010, originally purchased at Target. There currently isn't any electrical wiring done in this room so to add some pizazz and light, we went with an "outdoor restaurant" look by swaging the lights. It makes the room look so beautiful at night! -- It's also SUPER easy! We used screw in hooks to hold the lights in place and just made sure to make them tight so no one would bump their head on them or get strangled! Twinkle lights do wonders!

LEFT TO DO IN THE DINING ROOM
* Paint walls
* Replace all outlets, plates, switches and vent covers
* Touch up the white trim
* Buy tables and chairs
* Rugs!
* Add in curtains
* Run electricity and add in lighting above the tables
* Work on the "bar" project
* Put together a gallery wall
* Get creative and add something surprising to this room

Thursday, November 21, 2013

PROJECT HOME: A CHANGE IN PLANS

As you can see from the main floor layout above, we have essentially two sitting areas in the house. "The Den" which has a lot of beautiful natural lighting and a fireplace and the "Living Room" that has a window facing the front of the house. Next to the kitchen is the current dining room. SO I have been thinking a lot about the layout of our main floor and trying to think of creative ways to make the space work and be functional for our lifestyle. There is a couple things we knew we wanted:

* A large, cozy sitting area to host friends and family. This room could possibly have a media area but we aren't set on having a TV on the main floor.
* A studio space for me to work, shoot videos, take photographs and have a comfortable desk area to work at. This needed to be on the main floor so that when we have Soren I can essentially live on the main floor to take care of him, work, do chores and be present on the main area of the home.
* Lastly, we really wanted a great dining space to host dinners. When it's just Jon and I we love eating at the bar in the kitchen or taking it down to the movie room to catch up on our favorite shows. Once our family grows I know we will want to make family dinners an important part of our lives and we love hosting friends for dinners, so a great dining room would really be utilized.

The idea of having both a "Den" and "Living Room" just isn't a practical use of space for us. We wouldn't really use two sitting areas at this time and I would personally love to just put a lot of efforts and design into one sitting space instead of two. :) SO with that said, here is an update with our new main floor layout.


The Den will become our main hosting/sitting area. The living room will become our "Grand Dining Hall" and our current dining room will become my studio! I'm so excited about this change because it fits our family so well and can easily be changed in the future if we decide we need to utilize the space differently. We are REALLY excited about the "Grand Dining Hall" as we like to call it. We're planning to put a table in this space that seats 14 people. We'll probably do this by purchasing 2-3 of the same table and putting them in a row. This will make it easier to utilize the tables in different ways. This is also the room I'd really like to paint a fun color and make a really awesome beverage area! I'm excited to see this floor really come to life.

I'll be sharing inspiration boards and photos for these spaces on my blog soon!

Tuesday, December 18, 2012

PROJECT CONDO: THE DETAILS

I was so excited to be able to reveal my finished dining room space on A Beautiful Mess last week! It's been such an exciting accomplishment to finally finish this room. I've learned so much and overall really felt like keeping my focus on one room at a time helped me complete the space well and love the end results...AND have a completed room!

I've had a couple questions regarding where I purchased some of the items and furniture in my space and I wanted to give a full disclosure post, as well as share a couple extra photos of the finished room! If I missed anything or if you have any questions, please tweet me @maiedae or leave a comment below!


O N  T H E  W A L L
For the artwork, I really wanted to chose pieces that would add color into the room. All of my big pieces are very neutral and I needed something that would pop and add in the interest I was trying to achieve. For the art collage, I tried several combinations of art I already had and new art to see what looked best together. Once my favorite art was selected, I framed everything. I had Jenny help me lay the frames on the floor to create the shape I wanted. What I love about this is that I can easily change out the artwork if I decide I like something better and still keep the same look. In addition to the art collage, I really wanted a statement art piece. I fell in love with The Places in America print and decided to build a statement frame out of wood scraps to add more drama and really make it stand out. I love that Jon and I can record the places we've been and want to go on it with little push-pins. It's a special piece we can continue to enjoy throughout the years. And finally, I wanted to balance out all of the art with something different, so I decided on a handmade papier-mache deer head to hang next to the curtains. It's one of the first things you see when you walk into the room, which is great because I feel like it's a perfect "greeting" piece.

* The Universe - Society6
* Tiny Trees - Renegade Shop in Chicago (now closed, but check out their site)
* I Love My Family - BeauChamping
* Renegade Craft Fair - Renegade Shop in Chicago (now closed, but check out their site)
* Yes Ma'am Print - Jordan Grace Owens
* Green Andy Warhol Car - art.com
* Small Nebula Prints - Elise Mahan Fine Art
* Papier-Mache Deer Head - West Elm
* Places in America Print - You Me & The Royal We
* Wooden Frames - Michael's Craft Store
* America Pallet Frame - Handmade with my father-in-law

T A B L E  A R E A
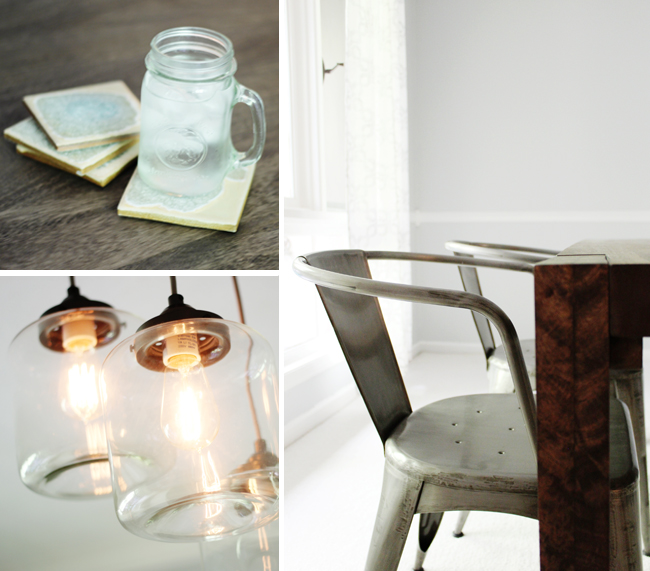
I knew I wanted a wooden table, and this was actually one of the first purchases we made for the space. I love how the legs face different directions and the coloring is fantastic. I was also set on not having all of the same exact chairs. We started with the metal chairs and then purchased the high-backs when the room was nearly finished. At first I thought that these would go at the head of the table, but in order to balance out the room and still make the art collage visible, we decided on a "benched" look near the windows.

* Metal Tub Chairs - World Market
* Suede High-Backs - World Market
* Blox Wood Table - CB2
* Sheepskin - IKEA
* Faux Deer Antler - Z Gallerie
* Celestial Coasters - Anthropologie

C A B I N E T
The cabinet was my second furniture piece purchase for the room. Jon and I loved the metal detailing on the doors and the little touch of vintage it added to the room. Jenny helped me decorate the inside with dinnerware and glassware pieces, as well as special items we've collected and been given. I love how it looks sophisticated and also serves as a functional piece.

* Plants - Whole Foods
* Tray under plants - IKEA
* Candle Holders - Target
* Organic Dinner Plates - West Elm
* Vintage Cabinet - Antiqued from Kudzu

R O L L I N G  B U F F E T  T A B L E
I originally envisioned using a bar cart or some other piece of furniture for this space, but after we purchased the cabinet we decided something like a buffet table for serving would be perfect. I created a small bar area and left the rest of the space mostly open on top for meals, snacks and extra drinks when we host get-togethers. It's very practical AND ended up being a great space for my record player and records.

* Console Table - World Market
* Record Player - Crosby Turntables
* Wire Storage Baskets - Urban Outfitters
* Hammered & Copper Bowl - World Market
* Terrarium - Urban Outfitters
* Boyd Owl - Antiqued
* Mirrored Tray - World Market
* Honeycomb Glassware - West Elm

T H E  E X T R A S
* Curtains - Target
* Metal Pipe Curtain Rod - Do It Yourself
* 3-Jar Light - West Elm
* Paint Color - Sherwin Williams  
* Filament Light Bulbs - Restoration Hardware

Overall, the words for this room as I was designing it and picking out pieces were: industrial, a touch of vintage, a little rustic, sophisticated, functional, and comfortable. I feel like we achieved our desires for the space and that it's a perfect combination of Jon and me. I've loved sharing my dining room decorating process with you! To look back on all the brainstorming and the full process click here! Also, be sure to continue following along with my Project Condo posts to see how I decorate my next room!


Wednesday, December 12, 2012

PROJECT CONDO: A BEAUTIFUL MESS FEATURE

Today I have two exciting things to announce. The first is that our dining room is finally finished!! If you've been following along with my project condo series, you've seen my planning process, inspiration boards, progress peeks, and now, after six months, it's complete! Jon and I made it a goal to finish our dining room on December 1st so we could host a fancy holiday diner party. Shortly after, I took some final photos and have been waiting to show you, because my finished dining room is being featured on A Beautiful Mess today! Hop on over to Elsie and Emma's blog to take a look at my finished space!

It's hard to believe that we started off with absolutely no furniture and a red room! I have to say that this process really took a lot of patience and time. It was difficult to merge my taste with Jon's in a functional way that we both really liked. I definitely spent a lot of time looking at the room; adding in new pieces, taking a step back..questioning my choices. Jenny helped me a TON, I'm so thankful for her advice, frame hanging skills, and that she helped me take all of these pieces and execute them to create a finished space.

I'm so happy to have a place that fits our family and a space we can use for hosting and throwing get-togethers. Just for fun, here is a before and after shot from where we started in July and where we are now:

I'll be posting more details later on where I've got everything and my final notes on the entire process. I'm also excited to start the decorating for our next room! After some thoughts and planning we decided to take on the living room as our next project. We already have a couch we're way in love with...now we just need to build the space around it...and that's as far as I've gotten. Let the inspiration-board building begin! I'll be posting some before photos of our living room in January once the Christmas tree is down. ;) Be back later with a final 12 Days of Christmas Cheer post!


Friday, November 16, 2012

PROJECT CONDO: ART WALL

It's done!! I put the last pieces of artwork in the frames today. :) Before I go into the details of the dining room art wall, I have to preface this post with the fact that this is the first time, since being married, that I've picked art, bought frames and put something like this together. I had a couple failed attempts when we were living in our old apartment, but ended up taking everything down since we didn't plan to be there long. I've had some of the artwork for over 1.5 years...all rolled up in poster tubs waiting to be used! And now, they're up on the wall...and it's made such a HUGE difference in the dining room. It added so much color and interest. I love it. I also love that as I find new art I can just replace what I already have, I tend to have an ever-evolving sense of style. ;)

For this process I first started by picking the artwork. A couple pieces got cut in the end, but I knew I really wanted my "yes ma'am" piece and my renegade piece to be up on the wall. I started with those as my foundation and began building around those pieces to find other prints to go with the collage. Once I got all of the art, I took a trip to Michael's and bought a variety of wood frames in different colors and styles. I got all of the frames for 40% off PLUS I had a 25% off total purchase coupon, so I ended up being way under budget for the frames. I totally recommend checking out Michael's for frames in the future if you have one close. They have so many to choose from and fantastic prices. The quality is beautiful too.

After all of the artwork was framed, I had my bestest, Jenny, come over and help me collage them on the floor to figure out the right composition. I love the shape she came up with and how she made everything work together. Thanks again, Jenny. I couldn't have done it without you! With a little teamwork, we started at the middle of the collage and began hanging the pieces on the wall. After about 30 minutes we were done! And voila! Art wall complete!

In case you're curious, here's where I bought my pieces: 1// The Universe - Society6 2// Little Trees - Renegade Shop in Chicago 3// I Love My Family - Beauchamping 4// Yes Ma'am - Jordan Grace Owens 5// Construction of a Nebula - Elise Manhan 6// Starlight Symbiosis - Elise Manhan 7// Green Andy Warhol Cat - Art.com 8// Renegade Craft Fair Poster - Renegade Shop

Also, here are a couple helpful posts on how to hang art collages that I recommend checking out:
* Two Rules of Thumb for Hanging Things on Your Walls by Smile & Wave
* Get the Hang of It by Young House Love
* How to Hang Art in Groups (Like Kate Space) by Apartment Therapy

Up next for the dining room? Well I still need to order the rest of my "final touch" pieces, put together a DIY, replace a few things and then I will be DONE, for now anyway. ;) But I'll finally be able to start working on the living room! I'm planning to post about my DIY framed art piece over the buffet table next and then I'll do a big before and after reveal. So exciting!

I hope you have a wonderful weekend! I'll be over with the beautiful ladies of blogshop, assisting them with their event in Atlanta on Saturday and Sunday. Planning to share pictures next week. :)


Thursday, November 08, 2012

PROJECT CONDO: FINAL TOUCHES

I can't believe my dining room is *nearly* finished! It's looking like my goal of having it complete by December 1st is going to happen and I can't wait to host a formal dinner party for my friends to celebrate! Yesterday was exciting because my father-in-law and I got to finish a very special project that's now hanging on the wall. That leaves only a few final touches left to complete the dining room!


1. I'm still really wanting a "bar cart" area in the space. Since we nixed the actual bar cart idea, I'm planning on using a space on our buffet table to create a bar area. I'm going to buy a mirrored vanity tray to put all of the bottles and accessories on. Something with a filigree element and some shine to add a little more metallic to the room. I also LOVE the branch styled bar accessories above. I have silverware very similar from West Elm.

2. I would love to have a small terrarium somewhere in the space. Most likely on the buffet table. Jon and I don't have a single live plant in our home due to my fluffy Kaito who LOVES eating all plants. I think a closed in terrarium like this would keep the little plants safe from kitty teeth and add an organic touch to the space.

3. These faux antlers are beautiful. I think I've settled in on this being my centerpiece for the table. I wanted something simple and natural looking for the centerpiece and I think this will look just right!

Aside from these purchases, I have just a small to-do list left! I can't wait to put it all together and show you how much it's changed from the beginning! I'm planning to show off my art wall and special project soon. Keep an eye out!!


Monday, November 05, 2012

PROJECT CONDO: TWO CHAIRS

The last time I shared a progress report on our dining room was after we purchased our industrial buffet table. Although the process has been slow, I've been able to find my artwork, buy frames, get them placed on the wall (thanks to Jenny!), start building a frame for a special piece of work, do some more decorating, AND find our chairs. :)

At first I was planning to pick up some colorful chairs, possibly from a thrift store or another more inexpensive place...and I was pretty set on the chairs being at the ends of the table. A couple Sundays ago, Jon and I took a trip to World Market to try out some chairs I had an eye on during one of their furniture sales. The chairs I thought might look best turned out to be uncomfortable-- especially for my 6'3" husband. :) BUT we found a set of beautiful velvety, cement-colored, high-back chairs. After a little back and forth, we decided to go ahead and get them. It took probably two good days of looking at them, putting them at the ends of the table, putting them side-by-side and trying a couple different configurations before we settled on the "benched" look. The right side of the room is a little "heavier" looking, so having them anchor the left side of the room makes it look so much better AND allows a great view of the art collage, which I will show you soon!

The chairs are SO comfortable. On the days I work from home or do work for Maiedae, I sit in them. Kaito cuddles up in one and Kyo usually snuggles up behind me. I love how they add comfort to our industrial look. It feels welcoming and like a place I would want to sit, sip cocoa, and write in my Moleskine.

I love seeing how the dining room has progressed and how some of my original thoughts have changed since my first inspiration board brainstorming. I can't wait to show you some of the other details and the final look! My goal is to have everything completed by December 1st. Jon and I are planning to throw a small Thanksgiving dinner with some of our friends and we hope to host it in a finished dining room!


Updated List of To-Do's for the Dining Room:
* Replace current curtains with four new panels for the curtain rod to give it more fullness. 
* Finish handmade frame for art piece above buffet table.
* Decorate the cabinet, tabletop and buffet with pretty things. 
* Put final two pieces of artwork in frames for the art collage. 
* Create candle DIY for top of cabinet.
* Replace outlet plates and hardware.
* Create menu//calendar or find a clock for the small wall space next to the curtains.

If you'd like to follow along with my dining room progress, click here!

I hope the start of your week has been wonderful! I'm looking forward to meeting with Emily and Jenny this evening to talk about Maiedae's brand and some fun marketing plans! Happy November!


Saturday, September 29, 2012

PROJECT CONDO: INDUSTRIAL BUFFET TABLE + DECOR

Last week I was able to make a couple purchases for the dining room from my wishlist. One of the last pieces of furniture we needed, aside from 2 chairs for the ends of the table, was a buffet style table to go up against the right wall. We wanted a space we could put food, beverages, snacks, etc., when guests came over, as well as a multi-purpose place for things like my record player. Here's to hoping it doesn't become my messy pile collector surface! 


You can see that I did a *little* decorating, which I suspect will greatly change once all of the other pieces are purchased and I get some help with the "surface decorating" (i.e. table, buffet table, cabinet), this is and I think will forever be my greatest decorating weakness. I'm good at picking out what I love, and putting together the larger pieces, but when it comes to surface decorating and gathering things into aesthetically pleasing groups...gah! I need some professional help. Over the course of decorating this dining room I can guarantee you right now that all of those things will change...probably at least 5-10 more times. ;) 

Oh! And I finally was able to purchase my missing light bulb. I found a small selection of vintage inspired light bulbs at Lowe's for a good price, so now my light fixture has fancy filaments. Below are a couple shots of my work-in-progress cabinet decorating. I couldn't find a good piece for the bottom left space so I just borrowed Kaito who was a great window model. ;) The little guy LOVES getting into anything I open: closets, kitchen cabinets, bathrooms...he stayed in there for 20 minutes before he asked to be let out. What a funny little guy. ;)


BUT I LOVE the buffet table. This table is supposed to be used as a TV entertainment piece, but I thought it would be the perfect size for this space. I got it at World Market, one of my new favorite home shops and had it delivered. It took me 15 minutes last night to put together and is very sturdy. I love the wheels, metal and texture of the wood. World Market FTW! 


Updated List of To-Do's for the Dining Room:
* Finish buying 1-2 pieces of art for the walls.
* Find mix-matched frames for "art wall".
* Purchase a rug. 
* Get two more window panels for the curtain rod to give it more fullness. 
* Find giant antique frame for menu project above buffet table.
* Find two end chairs for the table. Fabric? Leather? 
* Decorate the cabinet, tabletop and buffet with pretty things. 

Want to see where I started? Follow all of my dining room progress and inspiration boards here! 

If you have any tips on decorating my cabinet or buffet table, or any surface for that matter, I'm all ears! :) I hope you are having a wonderful Saturday. Jon and I are planning a relaxing rest of the day and a semi-scary movie night! 


Monday, September 10, 2012

PROJECT CONDO: CHOOSING A RUG

While I've been picking out the pieces for our art wall in the dining room, I've been thinking about what type of rug would look best in our space. I want something with a little pop and interest to anchor down the room. Overall, I'm looking for an industrial feel with rustic and vintage elements. I also don't want it to look too feminine or too masculine. Adding in the industrial buffet, end chairs, art wall and decorations will really add a lot to this look, but I'm looking for a perfect rug to compliment the whole space. I'm stuck on three different looks and could use a little advice!


1// Black & White Geometric Rug - I love the classic look of black and white as well as this bold pattern. I also like that this rug won't show spills or stains as easily.

2// Cowhide Rug - I think this option is really interesting. It's not something I would usually go for, but I'm starting to really fall for the rustic vibe it gives off. This might be a good option for cats since it's not woven.

3// Navajo Colorful Rug - This rug has more color and pattern to it then the other two. I think it gives off a nice vintage feel but still fits the coziness of the rustic look.

To get a little visual, here is the current progress of my dining room, with the rugs next to them to get a better overall visual. I think I like all of them?! Thoughts??


I'd love your help on deciding which one I should get! -- OR if you have a favorite rug shops online, please share as well! Thanks for your help! :)


Tuesday, September 04, 2012

PROJECT CONDO: ANTIQUE CABINET

When I originally envisioned our dining room makeover, I thought about buying a long buffet table with cabinets at the bottom and having a bar cart area. The more I played around with different ideas and furniture options, the more I realized I wanted to go in a little bit of a different direction for our space.

Looking at our progress post here, you can see in the bottom picture that I was planning to purchase a cabinet to fit in the corner of the dining room space. After some vehicle size issues and switching cars with family members, we were finally able to pick up a beautiful mid-century cabinet piece from my favorite antique store, Kudzu. 


I love how it fills the space and I think it's a great contribution to the room! Buying antique pieces for your home can be intimidating, but I love how much character it can add. Here are a couple antique purchasing tips I've learned so far:

1. What do you have in mind? ---> Antique stores can be quite overwhelming, some have a small stock and others have 100+ vendors selling. The best way to go into any antique store is with a list of treasures you're on the hunt for. It makes it a lot easier to see what you're looking for and not get distracted. I usually have anywhere from 3-5 items on my "to-find" list so I don't get too overwhelmed. 

2. Not sure? Take a photo! ---> When purchasing the cabinet for our dining room, I actually ended up taking 7 pictures of other pieces I thought might fit in that space as well. Afterward, I went home, sat on the floor facing the dining room, and scrolled through the pictures to image what each piece would look like in the space. It was so helpful to get a better idea of what the piece would actually look like in the space. 

3. Take a good look. ---> Before making any major antique purchases, make sure you give it a good look over. Make sure the piece is sturdy and in good shape. If it's damaged, can it be fixed? Is that something you want to invest in or should you keep looking?


I can't wait to get some more projects checked off my list for the dining room! Luckily, Jon and I spent the entire day Monday finishing up our unpacking and doing some more settling, so we're in a good place to start some serious work on decorating. Slow but steady! 

Here is an updated list of what we have left to do in the dining room:
* Finish buying 1-2 pieces of art for the walls.
* Find mix-matched frames for "art wall".
* Buy console//buffet table for the right side of the room.
* Purchase a rug. 
* Get two more window panels for the curtain rod to give it more fullness. 
* Find giant antique frame for menu project. 
* Find two end chairs for the table.
* Decorate the cabinet, tabletop and buffet with pretty things. 

PS - I'm totally counting this purchase as my Thrift-Tiquing challenge for the month of August! ;)


Saturday, August 18, 2012

PROJECT CONDO: STEEL CURTAIN ROD DIY

One of the things I really wanted to do while taking on the adventure of decorating our condo, was DIY projects. I've seen so many affordable, creative projects and I thought it would be a good way to grow in my crafting skills and experience in making things. When planning the decorations for our dining room, my original plan for the curtain rod was this piece from West Elm. I loved the industrial, sleek feel and thought it would fit in perfectly with our motif.

After a suggestion from my friend Jenny and encouragement from Jon, we decided to save money and build our own! The way this project turned out was exactly what I pictured. It has a very authentic, industrial look and is more of a statement then the original designer rods from West Elm. We also saved a little over $40.00 building these ourselves!


S U P P L I E S   N E E D E D
 * Two 3/4" wall/floor flanges
 * One 3/4" coupler
 * Two 3/4" elbow joints
 * Two 3/4" steel pipes in the length of your preference
 * Two 48" steel pipes 3/4" in diameter
 * Curtain panels
* Wall screws (be sure to include wall anchors if you're not directly screwing into a stud)

S T E P - B Y - S T E P
1. Attach the two 48" steel pipes to the coupler, putting one on each side.
2. Attach the elbow joints to the ends of the steel pipes making sure they are parallel with each other.
3. Once you've connected the pipes with the coupler and added the below joints, put on your curtain panels.
4. Attach the short steel pipes and wall flanges to the ends of each side. All of your pieces should be on at this point.
5. With a helper, hold the curtain rod in place, making sure it's level and at the correct height. Mark where you want it by putting pencil marks on the wall through each of the holes of the wall flanges.
6. Use wall screws to secure it to the wall.


D I Y  T I P S
* When purchasing your steel pieces, make sure the diameter of each piece is the same.
* Since this is a heavier rod, make sure you are either screwing into a wall stud or using anchors.
* I only have two curtain panels right now, but plan to add two more to make the window look more full. I would preplan this since it's difficult to take the rod off the wall once you put it up.

T O T A L   T I M E  &   C O S T
Time: 45 minutes
Cost: $60.00 (not including curtain panels)

I love how this turned out! It's our first DIY for the condo and I'm looking forward to doing more!


Monday, August 13, 2012

PROJECT CONDO: DINING ROOM PROGRESS

Jon and I spent the whole day Saturday working on home projects and focusing our efforts on the dining room. We had a long to-do list, but worked hard, listened to good music, and had great conversation. :) While it's super tempting to wait and reveal each room as it's completely finished, I thought it would be fun to do progress updates on the rooms we're working on to share our nesting journey with you step-by-step! The first photo was taken a few days after we moved in. We installed the first part of our light fixture but still had a lot to do. It's hard to see, but the white on the walls below the chair rail was textured wallpaper.


And here we are, a couple weeks after moving! Our table was delivered the Sunday after we moved. My father-in-law installed the lighting. This weekend, I purchased the metal tub chairs, curtains, and we painted the walls a beautiful white//grey. It feels so big, clean, and crisp! I can't wait to add in the other elements to really give it that industrial//rustic feel I'm looking for.

DINING ROOM ELEMENTS
* Light Fixture - West Elm
* Light Bulbs - Restoration Hardware (waiting on my third bulb to come in!)
* Wood Table - CB2
* Metal Tub Chairs - World Market
* Curtains - West Elm
* Table Costers - Anthropologie
* Curtain Holders - Urban Outfitters
* Paint: Olympic White - Sherwin Williams


I love the progress so far. Most of the day Saturday I felt myself going back and forth thinking, "Did I pick the right paint?"; "Will these curtains work?"; "Am I crazy?"...I know I've spent a lot of time putting this room together in my mind and on inspiration boards, but I've been nervous that I won't execute it correctly. BUT taking my time, asking opinions from Jon and close friends, and really searching for those pieces I love is making this process exciting and encouraging me to move forward at a slow pace.

I don't think this room will be done anytime soon, but my goal is to have it finished before the holidays...and possibly start on the living room before the end of the year. One room at a time! I can't wait to see what it looks like when it's "finished"!

Here is a rough sketch of my plans for the dining room:


DINING ROOM PLANS
* In the corner I'd like to put a vintage cabinet. Jon and I picked one out from a local antique store. It's from the mid-century and lovely! We are picking it up tomorrow!
* Next to the cabinet, I'd like to put together an intensely awesome art wall with wood and metal frames. I've been collecting artwork and still have a few more pieces to buy before collecting frames.
* Before the entrance to the kitchen we'd like a very industrial console table to serve as a buffet//display.
* Above the console we'd like to create a giant menu from an antique frame.
* I'm still on the hunt for perfect chairs to go on the ends of the table. I'm thinking leather and a tall back?
* I think one of the last purchases will be a rug. I want something to really anchor the room and pull things together. I'm not sure if I'm going neutral or geometric.
* Finally, I'd like to put together some special decor for the center of the table, the cabinet and the console. I'm probably going to stick with my inspiration words: industrial, rustic, clean.

So fun! I can't wait to continue sharing the progress! I'll be back later with an easy DIY and photos of the vintage cabinet!! Thanks for reading and sharing this nesting journey with me!


Thursday, August 02, 2012

PROJECT CONDO: PUTTING IT ALL TOGETHER

We are finally here, moved in, and making this condo ours. :) Even though things are pretty sparse, this feels like home and feels so peaceful. I can't wait to nest and finally start progress in the dining room! So far, we have our dining room table and our chandelier. We have a lot of work left, but we're hoping to be done by October. This is the inspiration board for our dream dining room:

1// Blox Dining Room Table - Jon and I chose this Blox dining room table from CB2. I am so happy with our decision! This table is sturdy, rustic looking, and has a lot of interest with the alternate facing legs.

2// Dumont Buffet - I love this mid-century inspired piece. It's currently out of stock, but I'm hoping it makes a comeback so we can get it for our dining room!

3// 3-Jar Chandelier - LOVE this chandelier from West Elm. It looks beautiful above our table.

4// Filament Bulb - Since our chandelier has clear glass jars that show off the bulb, we decided to go with more of a designer bulb and loved the ones at Restoration Hardware. We decided to get three different styles of lights to go in the light fixture.

5// Metal Tub Chair - These chairs are beautiful and will be the perfect touch to our industrial//rustic dining room. We are planning to get four of these and then two different chairs for the ends of the table, which haven't been decided on yet.

6// Industrial Pipe Rods - I love this pipe look as curtain rods. We are planning to have white//grey curtains for the dining room and these will be perfect for our industrial look.

7// Organic Shaped Dinnerware - We've been wanting casual dinnerware that can be dressed up or down for parties or everyday meals. This set has a beautiful organic feel.

8// Trivet - Pieces like this trivet will be great decorative elements in the dining room.

9// Bar Cart - I've gone back and forth between have a tray on the buffet to serve as my "bar cart" or actually having a bar cart. Since the dining room was a little bigger than I remembered, it looks like an actual bar cart will be perfect for the space. Can't wait to find that perfect the piece!

10// Branch Flatware - I fell in love with these right away. My dream flatware set. Perfect for the rustic element of our room.

11// I Love My Family - Perfect print.

12// Yes Ma'am - This print is the centerpiece of my art wall. I love everything about this print.

A U G U S T  T O - D O  L I S T
* Figure out what type of curtains to get and put them up ASAP. It's a little creepy to have such open windows at night.
* Return broken light bulb and get new one.
* Buy 4 metal tub chairs.
* Start taking the wall paper off the bottom half of the chair rail.
* Pick out paint color.
* Paint!
* Start purchasing art pieces to complete the art wall. 
* Get coasters to protect the table. 
* Figure out what type of rug would be good to anchor the room and tie everything together. 

I can't wait to show you some before pictures and the little progress we've made so far! More to come soon!